Prerequisites
Before following this guide, you will need:- Access to dashboard.herondata.io and via your
usernameandpassword, and also anapi_keyto call our API. - A working Plaid Link implementation including storing
item_ids andaccess_tokens in your system. - A unique identifier for each of your customers (which can have many Plaid connections) that you can send to us. We call this the
end_user_id.
Integration steps
- Log in to dashboard.herondata.io
- Go to Settings on the sidebar menu then scroll to the Integrations section.
-
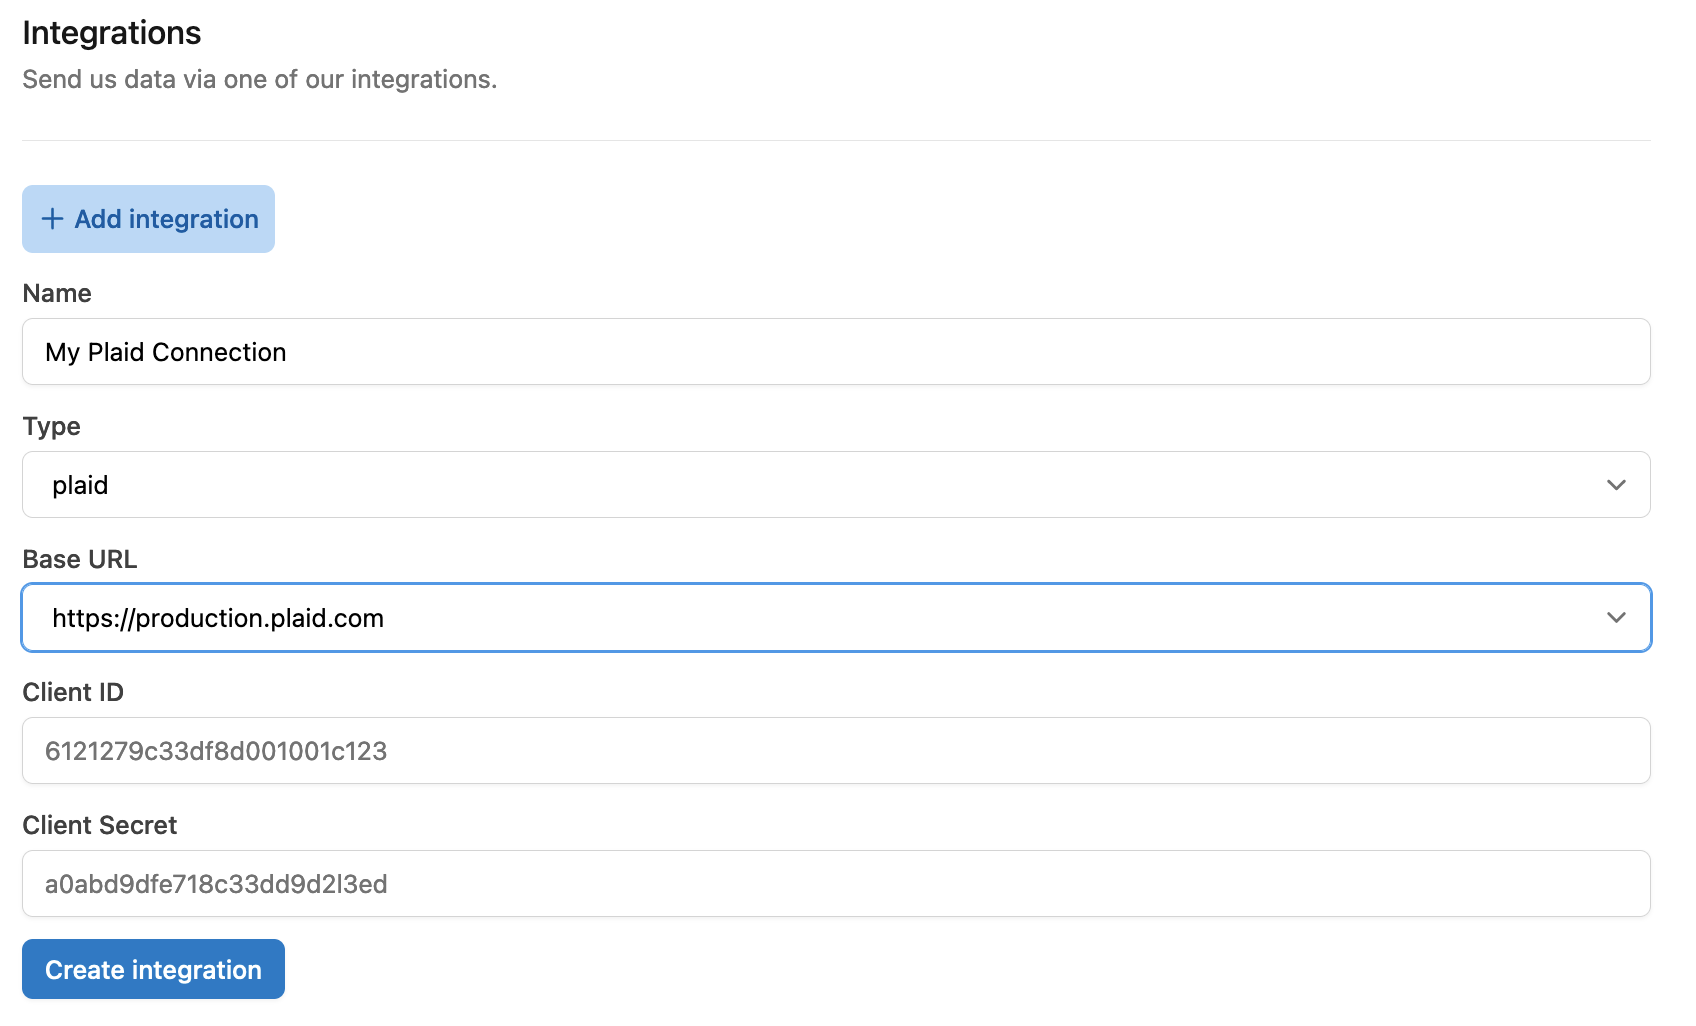
Select “Plaid” as an integration type and give your integration a meaningful name.
-
Go to your Plaid dashboard (https://dashboard.plaid.com/team/keys) and copy over the
client_idandsecret. :::note Ensure thesecretis for the environment (Development, Sandbox, Production) you intend to use :::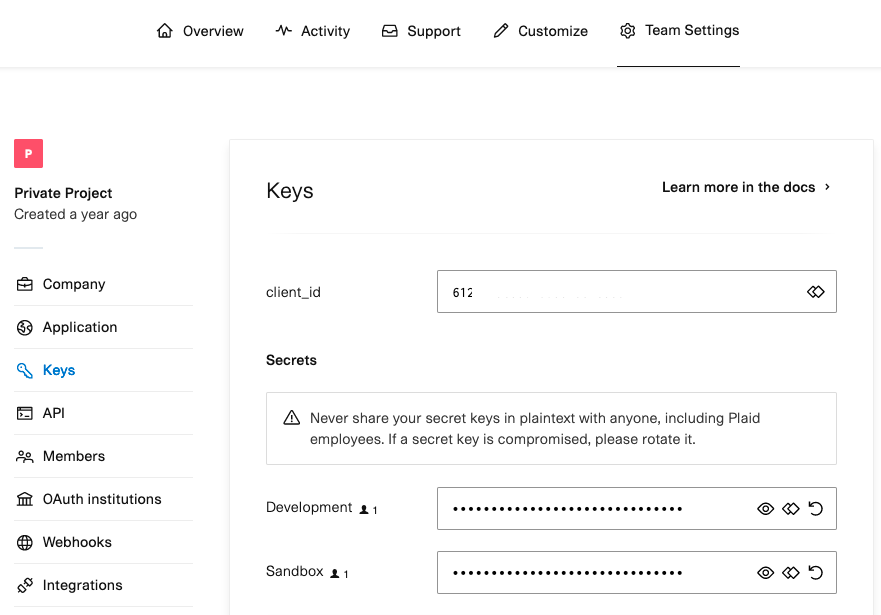
- Enter the Plaid keys from above into the Heron Dashboard, and then submit the form.
-
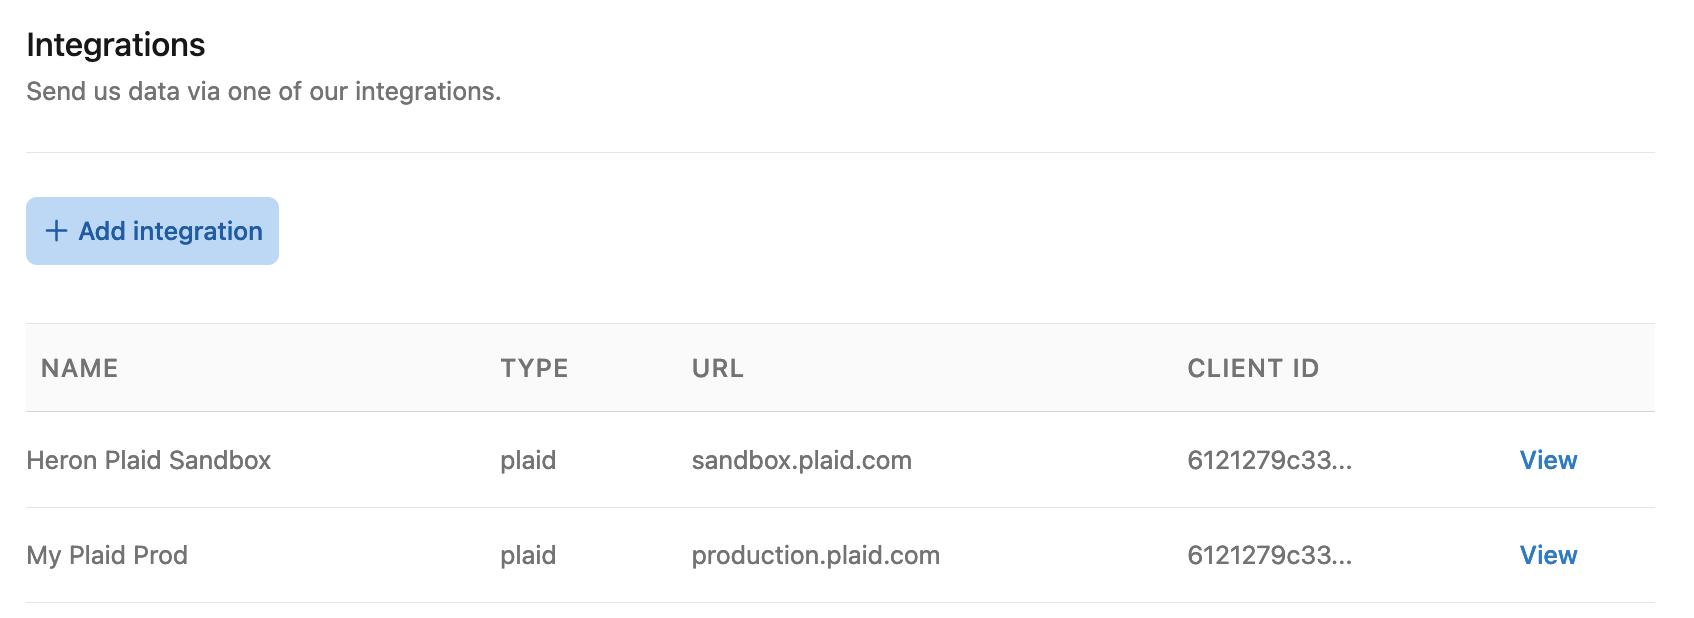
Once created you will see your integration in a table. Click View to get the webhook URL and link URL which you will need in the next steps.
-
In your code, set the
webhookparameter of/link/token/createto the webhook URL. (Alternatively, if you want to keep your webhook handling, forward all Plaid incoming webhooks including headers to the webhook URL) -
New Requirement: When creating a link token with the
/link/token/createendpoint, you must now include the transactions.days_requested field to specify the desired historical transaction length. The default is 90 days, but you should now set the transaction.days_requested field to 730 days. -
In your code, after calling
/item/public_token/exchangesend the resulting Plaiditem_idandaccess_token, along with yourend_user_idas aPOSTrequest to the link URL, documented here.
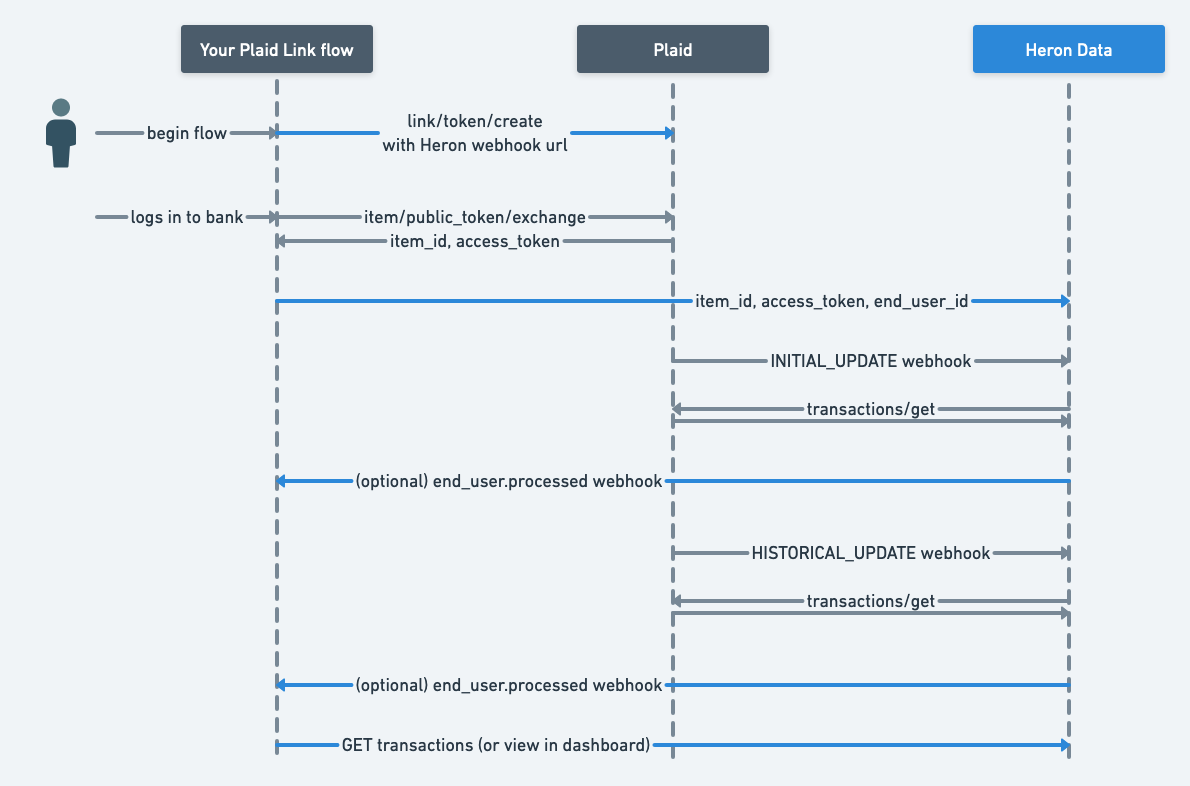
Final result
This diagram illustrates the final flow of data between your customers, your Plaid Link flow, Plaid and Heron Data. The blue lines represent the code changes explained in the previous section.